Tinkercad download is your gateway to a world of 3D design! Whether you’re a seasoned pro or a total newbie, Tinkercad’s intuitive interface and powerful features make it the perfect platform to bring your creative visions to life. This guide will walk you through everything from downloading and installing the software to mastering advanced techniques, ensuring you’re ready to craft amazing 3D models in no time.
Get ready to unleash your inner artist!
We’ll cover the download process for various operating systems, explore its file management capabilities, and delve into the user interface. We’ll also look at how to use Tinkercad’s tools to create both simple and complex designs, and provide resources for continued learning. Plus, we’ll compare Tinkercad to other 3D modeling software and discuss its strengths and weaknesses.
Let’s get started!
Tinkercad Download Process
Getting started with Tinkercad is super easy! It’s a browser-based application, meaning you don’t need a complicated download or installation for most users. However, there are some things to consider depending on your operating system and desired level of functionality.Tinkercad’s primary access point is through your web browser. This means that as long as you have a modern, supported browser (like Chrome, Firefox, Safari, or Edge), you can access and use Tinkercad directly from your computer, tablet, or even smartphone.
However, for offline access to your designs or for specific features, a desktop application might be preferred. The process varies slightly based on your operating system.
System Requirements for Optimal Tinkercad Performance
To get the best experience from Tinkercad, your system should meet certain minimum requirements. While Tinkercad is generally lightweight, a faster processor and more RAM will definitely improve the responsiveness, especially when working on complex 3D models or circuits. A stable internet connection is also crucial for seamless online access. Here’s a general overview:
- Operating System: Windows 10 or later, macOS 10.15 or later, Chrome OS. Older versions may work, but performance may be impacted.
- Processor: A relatively modern processor (e.g., Intel Core i3 or equivalent) is recommended for smooth performance, especially with complex designs. Older processors might work, but you might experience slower load times and rendering.
- RAM: At least 4GB of RAM is advisable for a good experience. More RAM (8GB or more) is recommended for larger projects and multiple browser tabs open simultaneously.
- Internet Connection: A reliable high-speed internet connection is essential for accessing Tinkercad’s features and saving your work. A slow or unstable connection can cause interruptions and delays.
- Browser: A current version of Chrome, Firefox, Safari, or Edge is suggested. Outdated browsers might not support all features or could cause compatibility issues.
Downloading Tinkercad for Different Operating Systems
While Tinkercad primarily functions through a web browser, there are some slight differences in how you might access the application depending on your OS. For Windows, macOS, and ChromeOS, access is almost entirely browser-based. There is no specific downloadable application for these systems.
Installing Tinkercad (Browser-Based)
Installing Tinkercad is straightforward. Simply navigate to www.tinkercad.com using your preferred web browser. You may need to create a free Autodesk account to save and manage your projects. Once logged in, you’ll have access to the Tinkercad workspace and all its features. No further installation is required.
Troubleshooting Common Installation Issues
Most issues encountered with Tinkercad are browser-related rather than installation-related, since it’s primarily web-based. Here are some common problems and solutions:
- Slow Performance: Close unnecessary browser tabs and applications to free up system resources. Check your internet connection for speed and stability.
- Browser Compatibility Issues: Ensure you’re using a supported and up-to-date web browser. Try clearing your browser’s cache and cookies.
- Account Login Problems: Double-check your Autodesk account credentials. If you’ve forgotten your password, use the password reset feature.
- Design Errors: If you encounter errors while designing, review the Tinkercad help documentation or community forums for assistance. These are often design-specific and not installation problems.
Tinkercad File Types and Management
So, you’ve got your awesome Tinkercad designs cooking, but now what? Knowing how to handle your files is key to avoiding a digital design disaster. Let’s dive into the file formats and best practices for keeping your Tinkercad projects organized and safe.Tinkercad primarily works with its own proprietary file format, which is automatically saved as a Tinkercad project.
This format stores all the design elements, including 3D models, circuits, and code, within a single file. While you can’t directly open these files in other CAD programs, you can export your designs in various formats suitable for other applications.
Supported File Formats
Tinkercad allows exporting your designs in several common formats, each with its own strengths. Understanding these options is crucial for sharing your work or using it in other programs. For 3D models, you can typically export as STL (Stereolithography) files, which are widely used in 3D printing. STL files represent the surface geometry of your model as a collection of triangles.
For 2D designs, you might export as an SVG (Scalable Vector Graphics) file, a vector image format that maintains crisp lines regardless of scaling. Additionally, you might export PNG (Portable Network Graphics) for raster image output.
Project Organization and Management
Effective project organization is essential for preventing confusion and lost work. Tinkercad provides folders to help you group related projects. Think of it like creating folders on your computer—it’s a super simple way to keep things neat. For example, you could create folders for “School Projects,” “Personal Projects,” or even categorize by the type of design, such as “3D Models” and “Circuits.” Within each folder, you should use a consistent naming convention for your projects.
Best Practices for Naming and Saving Files
Consistent naming is vital. Imagine trying to find a specific design among dozens of unnamed files! A good naming convention uses descriptive names, incorporating s like the project’s purpose, date, or version number. For example, “Classroom Lamp_v2_2024-10-27” is far better than “Design1.” Regular saving is also crucial. Tinkercad automatically saves your progress frequently, but it’s good practice to manually save your work every 15-20 minutes, especially if you are working on a complex design.
This will help mitigate any data loss due to unexpected software crashes or browser issues. Additionally, consider periodically backing up your Tinkercad projects to a local drive or cloud storage service. This provides an extra layer of security in case something happens to your online Tinkercad account.
Tinkercad’s Interface and Features
Tinkercad boasts a user-friendly interface designed for both beginners and experienced designers. Its intuitive layout and straightforward tools make 3D modeling accessible to a wide range of users. Understanding the interface and its features is key to unlocking Tinkercad’s full potential. This section will delve into the differences between the free and paid versions, explore the main toolbar and menus, and provide a tutorial on basic modeling techniques.
Tinkercad Free vs. Paid Version Features
The following table compares the key features available in Tinkercad’s free and paid (Tinkercad Plus) versions. While the free version offers a robust set of tools suitable for many projects, the paid version unlocks additional capabilities and storage.
| Feature | Tinkercad Free | Tinkercad Plus |
|---|---|---|
| 3D Design Workspace | Available | Available |
| Circuits Workspace | Available | Available |
| Codeblocks Workspace | Available | Available |
| Cloud Storage | Limited | Increased |
| Collaboration Features | Basic | Enhanced |
| Offline Access | Not Available | Available |
| High-Resolution Images/Exports | Limited | Enhanced |
| Advanced Features (e.g., more complex shapes) | Limited | Expanded |
Tinkercad Toolbar and Menus
The Tinkercad interface is characterized by a clean and intuitive design. The main toolbar, located at the top of the screen, provides quick access to essential tools. The menus, accessed via dropdown options, offer more advanced settings and functionalities. The toolbar typically includes buttons for selecting objects, manipulating views (rotating, zooming), and accessing the various workspaces (3D Design, Circuits, Codeblocks).
The menus provide options for saving, exporting, importing designs, and managing project settings. Understanding these tools is crucial for efficient workflow. For example, the “File” menu contains options for creating new designs, opening existing ones, saving your work, and exporting your designs in various formats (STL, OBJ, etc.). The “Edit” menu offers functions like undo/redo, copy/paste, and grouping/ungrouping objects.
The “View” menu allows you to customize the workspace, adjusting grid visibility and snapping options.
Basic Tinkercad Modeling Tutorial
This tutorial will guide you through creating a simple object using Tinkercad’s basic tools. We’ll build a small house using basic shapes and extrusion.
1. Shape Selection
Begin by selecting the “Shape” tool from the toolbar. A palette of basic shapes (cube, sphere, cylinder, etc.) will appear.
2. Creating the Base
Choose the cube and drag to create a square base for your house. You can adjust the dimensions using the width, depth, and height parameters in the panel on the right.
3. Adding Walls
Create another cube for the walls of the house. Position this cube on top of the base cube. Adjust the size to create the desired wall height.
4. Roof Construction
Use a triangular prism (found in the “Shapes” menu) to create the roof. You might need to rotate and position it carefully to fit atop the walls.
5. Door and Windows
Use smaller cubes to create a door and windows. Cut holes in the walls by using the “Subtract” function found in the “Modify” menu. You will select the door/window cube, and then the wall, to subtract the smaller cube from the larger one.
6. Extrusion (Optional)
While not strictly necessary for this simple house, you can use the “Hole” tool to add more detail or create a more complex design. For example, you could add chimney detail using a smaller cylinder and the “Hole” tool to create a realistic effect.
7. Refinement and Export
Once you’re happy with your design, adjust its size and position as needed. Finally, use the “Export” option from the “File” menu to save your design in the desired format (STL, OBJ, etc.). This allows you to use your design with 3D printing software or other 3D modeling applications.
Tinkercad Tutorials and Learning Resources
So, you’ve downloaded Tinkercad and are ready to dive in? Awesome! But where do you start? Luckily, there’s a wealth of resources available to help you learn this intuitive 3D design and electronics platform. From official tutorials to community-driven support, finding the right learning path is key to mastering Tinkercad. This section will Artikel some of the best resources and strategies to get you up to speed quickly.
Navigating the plethora of online learning resources can be overwhelming. Therefore, selecting reliable and well-structured materials is crucial for an efficient learning process. Focusing on structured learning paths, rather than randomly jumping between tutorials, will improve your understanding and retention.
Official Tinkercad Documentation and Tutorials
Tinkercad’s official website offers a comprehensive suite of tutorials and documentation. These resources cover everything from the basics of interface navigation to advanced techniques in 3D modeling and circuit design. They are well-organized, easy to follow, and often include interactive elements. The strengths lie in their accuracy and direct connection to the software, ensuring compatibility and up-to-date information.
However, the depth of some topics might be limited, requiring supplementary resources for more in-depth understanding.
Community Forums and Online Communities
Numerous online communities, such as dedicated Tinkercad forums and threads on platforms like Reddit, offer a valuable space for peer-to-peer learning and troubleshooting. Users share projects, tips, and solutions to common problems. The strength of these communities lies in the collective knowledge and diverse perspectives offered by experienced users. However, the quality of information can be inconsistent, and finding accurate and relevant solutions may require careful filtering.
Additionally, response times can vary.
Third-Party Tutorials and Courses
Numerous third-party websites and platforms offer Tinkercad tutorials and courses, often focusing on specific aspects of the software or particular project types. These resources can provide alternative explanations and approaches, broadening your understanding. The strengths are the variety of teaching styles and the potential for specialized knowledge. However, the quality can vary greatly, and it’s crucial to verify the credibility and accuracy of the information presented.
Some may also require paid subscriptions.
Effective Learning Strategies for Tinkercad
Successful Tinkercad learning involves a blend of structured learning and hands-on practice. Begin with the official tutorials to grasp the fundamental concepts and interface navigation. Then, supplement your learning with community resources to explore diverse approaches and problem-solving techniques. Most importantly, engage in consistent project-based learning. Start with simple projects and gradually increase complexity, applying newly acquired skills in a practical context.
This iterative approach reinforces learning and develops problem-solving skills. Don’t be afraid to experiment and make mistakes – learning from errors is a crucial part of the process. Finally, joining online communities fosters collaborative learning and provides a support network when facing challenges.
Tinkercad Design Examples and Inspirations: Tinkercad Download

Tinkercad’s versatility shines through in the diverse projects users create. From simple beginner-friendly designs to complex, intricate models, the platform offers a playground for creativity and learning. Exploring examples of existing projects helps inspire new ideas and showcases the potential of Tinkercad.
Here are five examples of designs created using Tinkercad, illustrating the range of possibilities:
Five Tinkercad Project Examples
- A Simple House: This beginner-level project involves creating a basic house shape using cubes and rectangular prisms. Users learn fundamental manipulation techniques like resizing, rotating, and grouping objects. The result is a charming, easily recognizable structure perfect for introducing young learners to 3D modeling. Adding details like windows and a door enhances the design’s appeal.
- A Detailed Car Model: This intermediate-level project requires more advanced techniques like using cylinders for wheels, and more precise measurements and alignments. Users might incorporate custom colors and add features like headlights and a spoiler. The result is a more refined and realistic representation of a vehicle.
- An Articulated Robot Arm: This intermediate to advanced project challenges users to design a functional robot arm with multiple moving joints. This necessitates using joints and hinges effectively and understanding how to constrain movement. It’s a great way to learn about mechanisms and kinematics within a digital environment.
- A Complex Gear System: This advanced project involves creating interconnected gears of varying sizes, showcasing mastery of precise alignment and the use of Tinkercad’s constraints. The challenge lies in ensuring smooth and accurate gear rotation, requiring an understanding of mechanical principles.
- A Personalized Keychain: This beginner-friendly project allows users to design a custom keychain with their initials or a simple shape. It’s a great example of using Tinkercad for personalized creations, combining basic shapes and text to create a meaningful object.
Tinkercad Projects by Skill Level
This table categorizes Tinkercad projects based on skill level, offering a clear progression path for users.
| Skill Level | Project Idea | Description | Key Techniques |
|---|---|---|---|
| Beginner | Simple Geometric Shapes | Creating basic shapes like cubes, spheres, and cylinders. | Resizing, rotating, grouping |
| Beginner | Personalized Keychain | Designing a keychain with initials or a simple shape. | Combining shapes, using text |
| Intermediate | Detailed Car Model | Creating a more complex car model with added details. | Precise measurements, using cylinders for wheels |
| Intermediate | Articulated Robot Arm | Designing a robot arm with multiple moving joints. | Using joints and hinges, understanding constraints |
| Advanced | Complex Gear System | Creating a functional gear system with multiple gears. | Precise alignment, understanding gear ratios |
| Advanced | Detailed Architectural Model | Creating a highly detailed building model with intricate features. | Advanced shape manipulation, using code blocks |
Designing a Detailed Car Model: A Step-by-Step Process
Creating a detailed car model in Tinkercad involves a systematic approach. This process emphasizes precision and the effective use of various tools.
So, you wanna download Tinkercad? It’s super easy, right? But thinking about bigger projects, you might want to check out some agile methodologies to keep your design process organized and efficient. Seriously, managing complex Tinkercad creations benefits from a structured approach, making the whole download-to-design process way smoother.
The design process begins with sketching a basic Artikel of the car, determining its overall dimensions and proportions. Then, using basic shapes like cubes and cylinders, we build the car’s body, carefully aligning and sizing each component. The wheels are created using cylinders, and the tires are added using slightly larger cylinders, paying attention to accurate placement. Next, smaller details like headlights, taillights, and windows are added using smaller shapes and careful alignment.
Finally, the entire model is reviewed for accuracy and any necessary adjustments are made. Throughout this process, the “Group” function is heavily utilized to manage and manipulate complex assemblies. The use of the “Align” tool ensures precise positioning of parts, leading to a professional-looking result. Color customization adds the finishing touch, enhancing the realism of the model.
Tinkercad for Beginners
Tinkercad is incredibly intuitive, making it perfect for first-time 3D modelers. Even without prior experience, you can quickly grasp the basics and start creating your own designs. This section will walk you through building a simple model and introduce you to some essential tools and techniques. Don’t worry about making mistakes—it’s all part of the learning process!Creating a simple 3D model in Tinkercad involves combining basic shapes.
Let’s build a small house. We’ll start with the foundation, then add walls, a roof, and maybe even a door and windows. The key is to understand how to manipulate and combine these basic shapes to create more complex forms.
Building a Simple House Model
We’ll begin by selecting a cube from the shapes menu. This will serve as the foundation of our house. Resize it to your desired dimensions using the manipulation tools. Next, we’ll add another cube for the walls, making it taller than the foundation. Align the wall cube on top of the foundation cube, ensuring they are properly joined.
For the roof, you can use a slightly smaller cube and position it on top of the walls, perhaps tilting it to create a slanted roof. You can achieve this tilt by using the rotate tool to adjust its angle. Finally, add smaller cubes for a door and windows, appropriately sizing and positioning them within the walls.
Using Tinkercad’s Constraint Tools
Tinkercad’s constraint tools are crucial for creating more complex and precise models. These tools allow you to easily align, group, and connect different shapes. For example, to ensure the walls are perfectly aligned with the foundation, use the alignment tools to center them. Grouping allows you to treat multiple shapes as a single unit, simplifying the process of moving and manipulating them.
This is especially helpful when you want to move the entire house without affecting the individual components.
Tips and Tricks for Beginners
Overcoming challenges in Tinkercad often involves understanding the software’s functionality. One common issue is accidentally moving or resizing parts of your model. The undo button is your best friend! Use it frequently to reverse unintentional changes. Another helpful tip is to work in a methodical manner, building your model step-by-step. Start with the basic shapes and gradually add complexity.
This approach prevents you from getting overwhelmed and allows for easier troubleshooting. Finally, don’t be afraid to experiment! Tinkercad is a forgiving environment, and you can always undo mistakes or start over.
Tinkercad for Educators
Tinkercad offers a fantastic platform for educators to integrate design and engineering principles into their curricula, fostering creativity and problem-solving skills in students of all ages and skill levels. Its intuitive interface and accessible features make it an ideal tool for introducing complex concepts in a fun and engaging way, bridging the gap between theoretical learning and practical application.Tinkercad’s versatility allows for a wide range of educational applications, from elementary school introductions to basic shapes and design to advanced high school projects involving complex mechanisms and coding.
The platform’s affordability and accessibility make it a valuable resource for schools with limited budgets or resources.
Classroom Activities Using Tinkercad
Tinkercad’s user-friendly environment lends itself to various classroom activities. Students can easily collaborate on projects, fostering teamwork and communication skills. The immediate visual feedback provided by the platform allows for quick iterations and experimentation, encouraging a growth mindset and a willingness to take risks.
- Designing and Building 3D Models of Geometric Shapes: Elementary school students can explore basic shapes like cubes, spheres, and cylinders, learning about volume, surface area, and spatial reasoning. They can manipulate these shapes, combine them, and even create simple structures like houses or cars.
- Creating Circuits and Learning about Electronics: Older students can design and simulate simple circuits, learning about electricity, conductivity, and basic circuit components like resistors, LEDs, and switches. This provides a hands-on approach to understanding abstract concepts.
- Developing Mechanical Systems and Mechanisms: Students can build simple machines like levers, pulleys, and gears, exploring concepts like force, motion, and mechanical advantage. This activity bridges the gap between theoretical physics and practical application.
- Designing and Prototyping Solutions to Real-World Problems: Students can tackle challenges like designing a more efficient water filtration system, a better ergonomic chair, or a sustainable packaging solution. This encourages critical thinking and problem-solving skills within a relevant context.
Benefits of Tinkercad in STEM Education
The integration of Tinkercad into STEM education offers numerous benefits. Its accessibility and ease of use remove barriers to entry, allowing students of all skill levels to participate and succeed. The immediate feedback loop allows for rapid prototyping and iterative design, encouraging experimentation and a willingness to embrace failure as a learning opportunity.
- Improved Problem-Solving Skills: Tinkercad encourages students to approach problems systematically, testing and refining their designs until they achieve their desired outcome.
- Enhanced Creativity and Innovation: The platform’s intuitive interface and vast possibilities inspire creativity and allow students to explore unconventional solutions.
- Development of Collaboration and Teamwork Skills: Tinkercad facilitates collaborative projects, teaching students how to work effectively in teams.
- Increased Engagement and Motivation: The visual and interactive nature of Tinkercad makes learning more engaging and fun, leading to increased student motivation.
- Cost-Effectiveness and Accessibility: Tinkercad is a free, web-based platform, making it accessible to schools and students with limited resources.
Tinkercad Community and Support
Tinkercad, while a fantastic standalone 3D design and electronics simulation tool, truly shines when you tap into its vibrant community. Connecting with other users unlocks a wealth of support, collaboration opportunities, and inspiration that can significantly enhance your Tinkercad experience, regardless of your skill level. This section explores the various avenues for engaging with the Tinkercad community and the benefits of doing so.The Tinkercad community is spread across several platforms, each offering unique advantages for finding help, sharing projects, and learning from others.
These platforms provide a diverse ecosystem where beginners can seek guidance and seasoned users can share their expertise. Active participation in these communities can significantly accelerate your learning curve and foster a sense of belonging within the wider maker community.
Accessing Tinkercad Support Resources
Tinkercad offers a dedicated help center directly within its platform. This resource provides comprehensive documentation, tutorials, and troubleshooting guides covering a wide range of topics. Additionally, searching the help center often yields answers to frequently asked questions. For more complex issues, contacting Tinkercad support directly through their website is an option. The response time varies depending on the complexity of the issue and the volume of support requests.
Tinkercad Forums and Online Communities
While Tinkercad doesn’t have a dedicated, official forum, many online communities dedicated to 3D modeling, electronics, and STEM education often include discussions and support threads specifically for Tinkercad. These forums typically host users sharing their projects, asking for help with specific challenges, and discussing best practices. Sites like Reddit, for example, have subreddits focused on 3D printing and design where Tinkercad users frequently participate.
Searching for “Tinkercad” on these platforms will likely yield relevant communities.
Leveraging Social Media for Tinkercad Support
Social media platforms like Twitter, Facebook, and Instagram often have groups or hashtags dedicated to Tinkercad. These platforms provide a quick and easy way to ask questions, share your creations, and engage in discussions with other users. Searching for relevant hashtags, such as #Tinkercad or #3Dprinting, can connect you with a large network of users. However, it’s important to note that the level of support offered on social media can be less structured than in dedicated forums or help centers.
Benefits of Engaging with the Tinkercad Community
The benefits of engaging with the Tinkercad community are multifaceted. Firstly, it provides access to a vast pool of knowledge and expertise. Experienced users can offer valuable guidance on troubleshooting problems, optimizing designs, and learning new techniques. Secondly, collaborating with others can lead to innovative project ideas and the development of new skills. Sharing your work and receiving feedback from the community can greatly enhance your design process.
Finally, the sense of community and shared passion for making can be incredibly motivating and inspiring, fostering a supportive environment for learning and growth.
Tinkercad’s Limitations and Alternatives
Tinkercad is a fantastic tool for beginners and educational purposes, offering a simple and intuitive interface for 3D modeling. However, its ease of use comes at the cost of certain functionalities and capabilities found in more advanced software. Understanding these limitations is crucial for choosing the right tool for your project. This section will explore Tinkercad’s shortcomings and compare it to other popular 3D modeling software.Tinkercad’s strengths lie in its simplicity and accessibility.
Its drag-and-drop interface, combined with a limited but sufficient set of tools, makes it perfect for quick prototyping and learning the basics of 3D modeling. This ease of use, however, translates into limitations when tackling more complex projects.
Comparison with Other 3D Modeling Software
Several 3D modeling programs offer more advanced features than Tinkercad. For instance, Fusion 360, a professional-grade CAD software, allows for far more complex designs, including intricate curves, precise dimensions, and advanced modeling techniques like NURBS surface modeling. While Fusion 360 has a steeper learning curve, its capabilities significantly exceed Tinkercad’s. Similarly, Blender, a free and open-source 3D creation suite, provides extensive modeling, animation, and rendering tools, allowing for highly detailed and realistic models.
However, Blender’s interface can be overwhelming for beginners. Other options like SketchUp offer a balance between ease of use and functionality, bridging the gap between Tinkercad’s simplicity and the complexity of professional software. Each program caters to different needs and skill levels. Choosing the right software depends on the complexity of the project and the user’s experience.
Functionality and Design Complexity Limitations
Tinkercad’s reliance on basic shapes and limited manipulation tools restricts the creation of highly detailed or organic models. Creating complex curves or freeform shapes requires significant workarounds, if possible at all. Furthermore, the lack of advanced features like Boolean operations beyond simple union, subtraction, and intersection limits the possibilities for creating intricate designs. Precise dimensioning and constraint-based modeling are also absent, making it difficult to create models with exact specifications.
The inability to easily import and export various file formats beyond the standard .STL can also be a limitation for users needing to collaborate or integrate their designs into other workflows. Finally, Tinkercad’s limited rendering capabilities restrict the visualization of the final product.
Situations Where Tinkercad Is Not Suitable
Tinkercad is not ideal for projects requiring high levels of precision, intricate designs, or advanced modeling techniques. For example, designing a complex mechanical part with tight tolerances, creating a highly detailed character model for a video game, or building a realistic architectural model would all be better suited to more advanced software. Projects involving intricate organic shapes, like sculpting a realistic human figure, are also beyond Tinkercad’s capabilities.
Similarly, projects requiring advanced simulations or analyses, such as stress testing a bridge design, would need software with specialized features beyond Tinkercad’s scope. In short, when a project demands high precision, complex geometry, or advanced features, Tinkercad might not be the optimal choice.
Tinkercad and 3D Printing
Tinkercad’s ease of use makes it a popular choice for designing 3D printable objects, but successfully transitioning from digital design to a physical print requires understanding the export process and necessary file preparation. This section details the steps involved in exporting your Tinkercad creations and preparing them for optimal 3D printing results.The process of exporting a Tinkercad design for 3D printing is surprisingly straightforward.
Once you’ve finalized your design, you’ll need to export it in a format compatible with your 3D printer and slicing software. Tinkercad primarily supports STL and OBJ file formats, both widely used in the 3D printing world. The export process itself involves simply selecting the “Export” option within Tinkercad, choosing your desired file format, and saving the file to your computer.
From there, you’ll import this file into your slicer software to prepare it for printing.
Exporting Tinkercad Designs for 3D Printing
To export your design, navigate to the “Export” button within the Tinkercad interface. You’ll then be presented with the option to select either an STL or OBJ file. STL (Stereolithography) files are generally preferred for 3D printing due to their simplicity and widespread compatibility. OBJ (Wavefront OBJ) files are also suitable but may require additional processing depending on your slicer software.
After selecting your file type, choose a location on your computer to save the file. Remember to use a descriptive file name to keep your projects organized. The exported file will then be ready for import into your 3D printing slicer software.
Preparing Tinkercad Models for 3D Printing
Several factors influence the success of a 3D print. Before exporting, carefully review your design for potential issues. Ensure your model is a closed, solid object, free of holes or gaps that could cause printing errors. Check for any overly thin or delicate features that might break during the printing process. Consider the orientation of your model on the print bed; strategically positioning it can minimize support material needed and improve print quality.
A well-oriented model, for example, one that minimizes overhangs, will generally result in a faster and cleaner print. Lastly, make sure all parts are properly joined and there are no overlapping or interfering geometries. Consider using Tinkercad’s built-in tools for analyzing your model for potential problems.
3D Printing File Formats and Tinkercad Compatibility
Tinkercad primarily supports two file formats commonly used in 3D printing: STL and OBJ.STL (Stereolithography) is a widely accepted format, representing a 3D model as a collection of triangular facets. Its simplicity and robustness make it ideal for most 3D printers and slicing software.OBJ (Wavefront OBJ) is another common format that uses vertices, edges, and faces to define the model.
While versatile, it sometimes requires additional processing in the slicer software compared to STL. Tinkercad’s export process is designed to generate clean and easily printable STL files, although the OBJ option provides an alternative if your slicer software prefers that format. It’s generally recommended to start with STL for its superior compatibility and ease of use in the 3D printing workflow.
Advanced Tinkercad Techniques
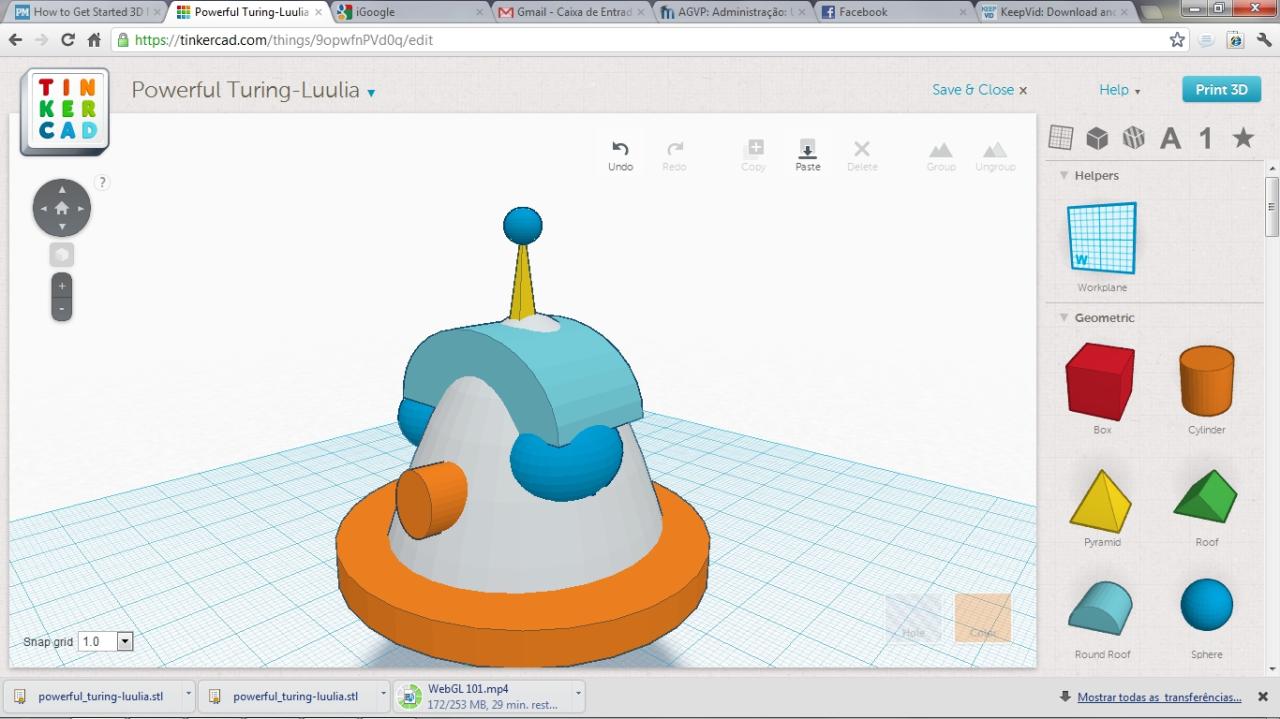
Tinkercad’s intuitive interface might lead you to believe it’s only for simple designs, but beneath the surface lies a powerful suite of tools perfect for creating complex 3D models. Mastering these advanced features unlocks a whole new level of design possibilities, allowing you to build intricate and detailed projects. This section dives into the world of groups, holes, and Boolean operations, showcasing how these tools can transform your Tinkercad workflow.This section provides a step-by-step guide to building a complex 3D model using Tinkercad’s advanced features, including groups, holes, and Boolean operations.
We’ll also discuss strategies for optimizing your designs for efficiency and performance, ensuring smooth operation and preventing unexpected issues.
Grouping and Sub-Assemblies
Efficiently managing complex designs requires organizing individual shapes into logical groups. Think of groups as containers; you can manipulate the entire group as a single unit, rotating, scaling, or moving it without affecting the individual components. This drastically simplifies working with large projects. For example, creating a chair might involve separate groups for the seat, legs, and back. Grouping these allows you to easily reposition the entire chair or adjust the scale without having to manually manipulate each individual part.
This streamlined approach makes editing and refining your designs much more manageable.
Creating Precise Holes
Holes are essential for creating realistic and functional designs. Instead of subtracting material manually, Tinkercad’s hole tool allows you to precisely define the size and location of holes within your shapes. Imagine you’re designing a lampshade; using the hole tool, you can easily create precise openings for the light bulb and power cord, significantly enhancing the realism and functionality of your model.
Precise control over hole placement is key to avoiding unexpected issues during the 3D printing process, ensuring a clean and accurate final product.
Boolean Operations: Union, Subtraction, and Intersection
Boolean operations are the real power tools in Tinkercad. These operations—union, subtraction, and intersection—allow you to combine or subtract shapes in powerful ways, creating complex forms from simpler building blocks.
- Union: Combines multiple shapes into a single, unified object. Imagine merging two separate parts of a robot arm to create a complete limb.
- Subtraction: Removes one shape from another, creating holes or cutouts. This is perfect for creating intricate designs like a key or a detailed gear.
- Intersection: Creates a new shape that only includes the overlapping area of two shapes. This can be useful for creating unique geometric designs.
For example, to create a complex gear, you could start with a cylinder, then subtract a smaller cylinder to create the central hole. Further subtraction of rectangular shapes can create the teeth. Using Boolean operations intelligently and strategically leads to sophisticated models with minimal effort.
Step-by-Step Guide: Creating a Complex 3D Model
Let’s build a simple model of a stylized robot head.
1. Create the Head
Start with a sphere for the main head.
2. Add the Antenna
Add a smaller cylinder for the antenna, positioning it on top of the sphere. Use the union operation to combine the antenna with the head.
3. Create the Eyes
Create two smaller spheres for the eyes and position them on the head. Use the union operation again to integrate the eyes into the head.
4. Add the Mouth
Use a slightly curved rectangular prism for the mouth. Use the subtraction operation to cut a mouth-shaped hole into the head.
5. Create the Neck
Use a short cylinder for the neck. Position it below the head and use the union operation to connect it to the head.
Optimizing Tinkercad Designs, Tinkercad download
To maintain efficiency and performance in Tinkercad, it’s crucial to avoid excessively complex models. Grouping objects and utilizing Boolean operations effectively helps to minimize the number of individual shapes, leading to a more streamlined design and better performance. Also, regularly saving your work prevents loss of progress and ensures that you can always return to your project without encountering any problems.
Closing Notes
So, there you have it! From the initial Tinkercad download to creating complex 3D models and even preparing designs for 3D printing, we’ve covered a lot of ground. Remember, the key to mastering Tinkercad is practice and exploration. Don’t be afraid to experiment, try new things, and join the vibrant Tinkercad community for support and inspiration. Happy designing!
FAQ Section
Is Tinkercad free?
Yes, Tinkercad offers a free version with access to many features. A paid version, Tinkercad Plus, provides additional storage and capabilities.
Can I use Tinkercad on my tablet or phone?
Tinkercad is primarily a web-based application, so you can access it from any device with a web browser. However, it’s best used on a desktop or laptop for optimal performance.
What if I have trouble downloading or installing Tinkercad?
Check your internet connection and ensure you have sufficient disk space. If problems persist, consult Tinkercad’s help section or online forums for troubleshooting assistance.
How do I save my Tinkercad projects?
Tinkercad automatically saves your work. You can also manually save and download your designs as various file types.
What file formats does Tinkercad support?
Tinkercad primarily works with its own file format, but you can also import and export designs in STL and OBJ formats, commonly used for 3D printing.